|
|
|
Who's Online
There currently are 6043 guests online. |
|
Categories
|
|
Information
|
|
Featured Product
|
|
|
 |
|
|
There are currently no product reviews.
 ;
Great Manual! It contains all the wiring schematics and mechanical exploded views that are essential for service and repair. I was surprised I even found this for such an old machine. Only wish I knew of this site many years ago.
;
Great manual very clear copied. You are making an incredible job. I appreciate a lot the rapidity and your efficiency. Thanks a lot
;
Good pdf of the service manual for this unit. Includes disassembly instructions, full schematics, board layouts, parts lists and diagnostic information. Some information is in the pdf twice (single pages, and split pages), but that could be how it was originally generated by panasonic, or perhaps the idea is to make it eaiser to put onto 8.5 x 11" pages.
Information was exactly what I needed. Delivery was overnight (less than 12 hours) and I was happy with the process.
;
5 STARS for FAST DELIVERY, BEST PRICES and QUALITY PRODUCT. Item was exactly as described with superb resolution. Will definitely source all my future requirements from this website. Thanks a lot owner-manual.com!
;
OEM manual provided all schematics, board layouts and component specs necessary to facilitate unit maintenance. All pages were clear and readable.
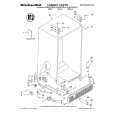
KV-EF29M61
RM-881
The operating instructions mentioned here are partial abstracts from the Operating Instruction Manual. The page numbers of the Operating Instruction Manual remain as in the manual.
SECTION 1 GENERAL
Using Your New TV
Getting Started
Step 1
Connect the antenna
If you wish to connect a VCR, see the �Connecting a VCR� diagram below.
Notes � If you connect a monaural VCR, connect the yellow plug to (the yellow jack) and the black plug to -L (MONO) (the white jack). � If you connect a VCR to the � (antenna) terminal, preset the signal output from the VCR to the program position 0 on the TV. � Do not simultaneously connect video equipment to the � 3 (video input) jacks at the front and the � 3 (video input) jacks at the rear of your TV. � If both (S video input) and � 1 (video input) are input simultaneously, the (S video input) is automatically selected. To view the video input to � 1 (video input), disconnect the S video cable. � When no signal is input to the connected VCR (or video equipment), the screen becomes blue.
or Antenna cable (not supplied) IEC connector (not supplied)
Using Your New TV
Step 2
Insert the batteries into the remote
Note � Do not use old batteries nor use different types of batteries together.
� 4 �
Antenna cable (not supplied) : Signal flow
Step 3
Preset the channels
Connecting a VCR
1
Antenna cable (not supplied) To antenna output VCR To � (antenna)
ONE-PUSH AUTOMATIC PROGRAMING
2
AUDIO VIDEO
AUTO PROGRAM PR : 0 1 T V SYS : B / G VHF L O W
1
1 4 7 2 5 8 3 6 9
S video cable (not supplied)
AUTO PROGR
VIDEO IN VIDEO OUT
To video and audio outputs
To S video output
To (S video input)
To � 1, 2, or 3 (video input) (yellow) -L (MONO) (white) -R (red) : Signal flow
Now You Are Ready. . .
The channels are now automatically preset in your TV. To preset the channels manually, see page 34.
Audio/Video cable (not supplied)
4
Using Your New TV
Using Your New TV
5
|
|
|
> |
|